
6 Tips for Better Photos
Author: Kelsey Thompson
6 Tips for Better Photos
I’m sure you’ve heard the phrase “a picture is worth a thousand words”.
It’s cliche for a reason - a photo is an instant brand representation and can create a positive impression on your online customers. Online shoppers may not have the same level of personal connection to your brand as your local, in-store customers.
When shopping online, anything that makes the process slower or harder is going to lead to more abandoned carts. This includes any photos that make our customers pause, second guess themselves or have to do extra work (i.e. reading lots of product descriptions to find answers.) Split second decisions are made based on photographs.
One way to build trust and increase customer satisfaction is with good quality product photos.
Show your customers exactly what they’re getting. Accurately representing your product prevents confusion, limits returns, and builds brand loyalty. It turns a hesitant buyer into a confident one. Sounds pretty great, huh?
Before we dive in… I’d recommend at least three different photographs for each product listing. A straight shot of the item by itself, a staged shot, and a detail shot.
1. Keep It Clean
Visually clean, that is. Fun backdrops, unique settings and funky lighting are all appropriate for the occasional artsy social media post. But when you are planning out product shots for your website, use a neutral background and use it for every single photo - at least each“collection” or menu occasion. Your sympathy collection is going to be more shoppable if every photo has the same backdrop. At least keep it to a family of backdrops with similar colors and textures. Same goes for every other occasion or collection.
This creates a clean and consistent looking browsing experience. Your customers can compare sizing and style more easily when your flowers are displayed against a consistent background. This is specifically for the initial product view - the thumbnail shots that browsers see as they are scrolling. Once they click into a specific product listing, you’ll provide more photos for context.
2. Set The Stage
Take photographs that show the product’s scale. What is one of the number one questions we get as floral designers when helping a customer choose a bouquet? …. “How big is it??”
When we’re on the phone or in person, it’s easy to use references to objects or descriptive language to convey size. But how do we communicate scale to our online customers? Great photos, of course! But first, let’s define scale.
Scale focuses on the size of the floral design relative to its settings and surrounding area. You may describe something as being sized for an eight person dining table, or as large as a shoebox… Scale assists our mind with understanding the size of an object.
So how can we show scale to our online shoppers? With a staged shot.
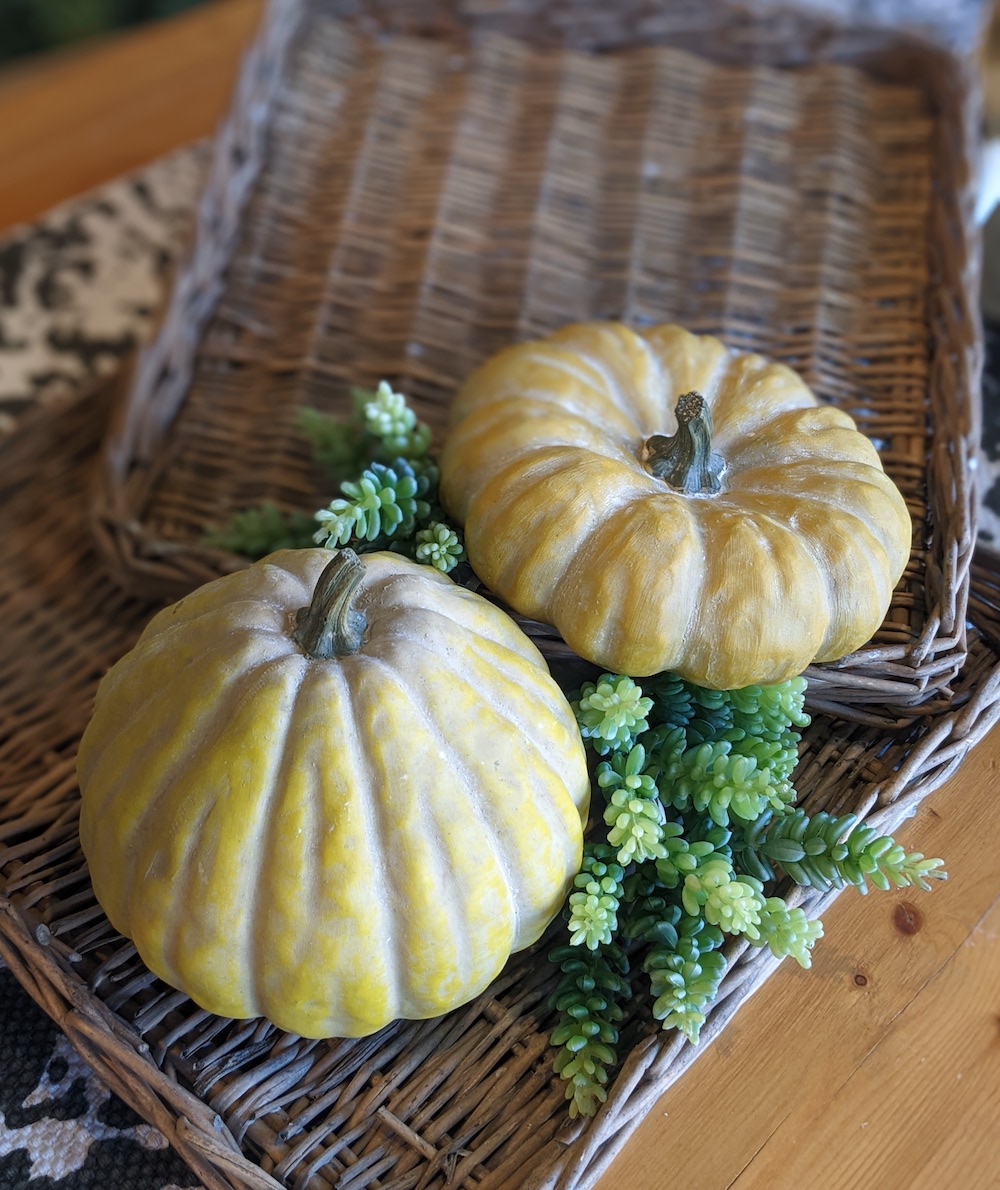
The staged shot will have some objects to show the size of your bouquet or gift item in relation to those objects. Some examples are photo frames, candles/candlesticks, books, coffee mugs or a water pitcher. Perhaps for this photo you stage a coffee table with books, a small object and your bouquet as the star.
If your staff isn’t camera shy - have the team member that designed the bouquet hold it. Talk about creating a personal connection! Try using your neutral backdrop photos on your landing pages to keep them clean and consistent, and this “scale” photo on each individual product listing page as a secondary image. Your third image? A product close up!
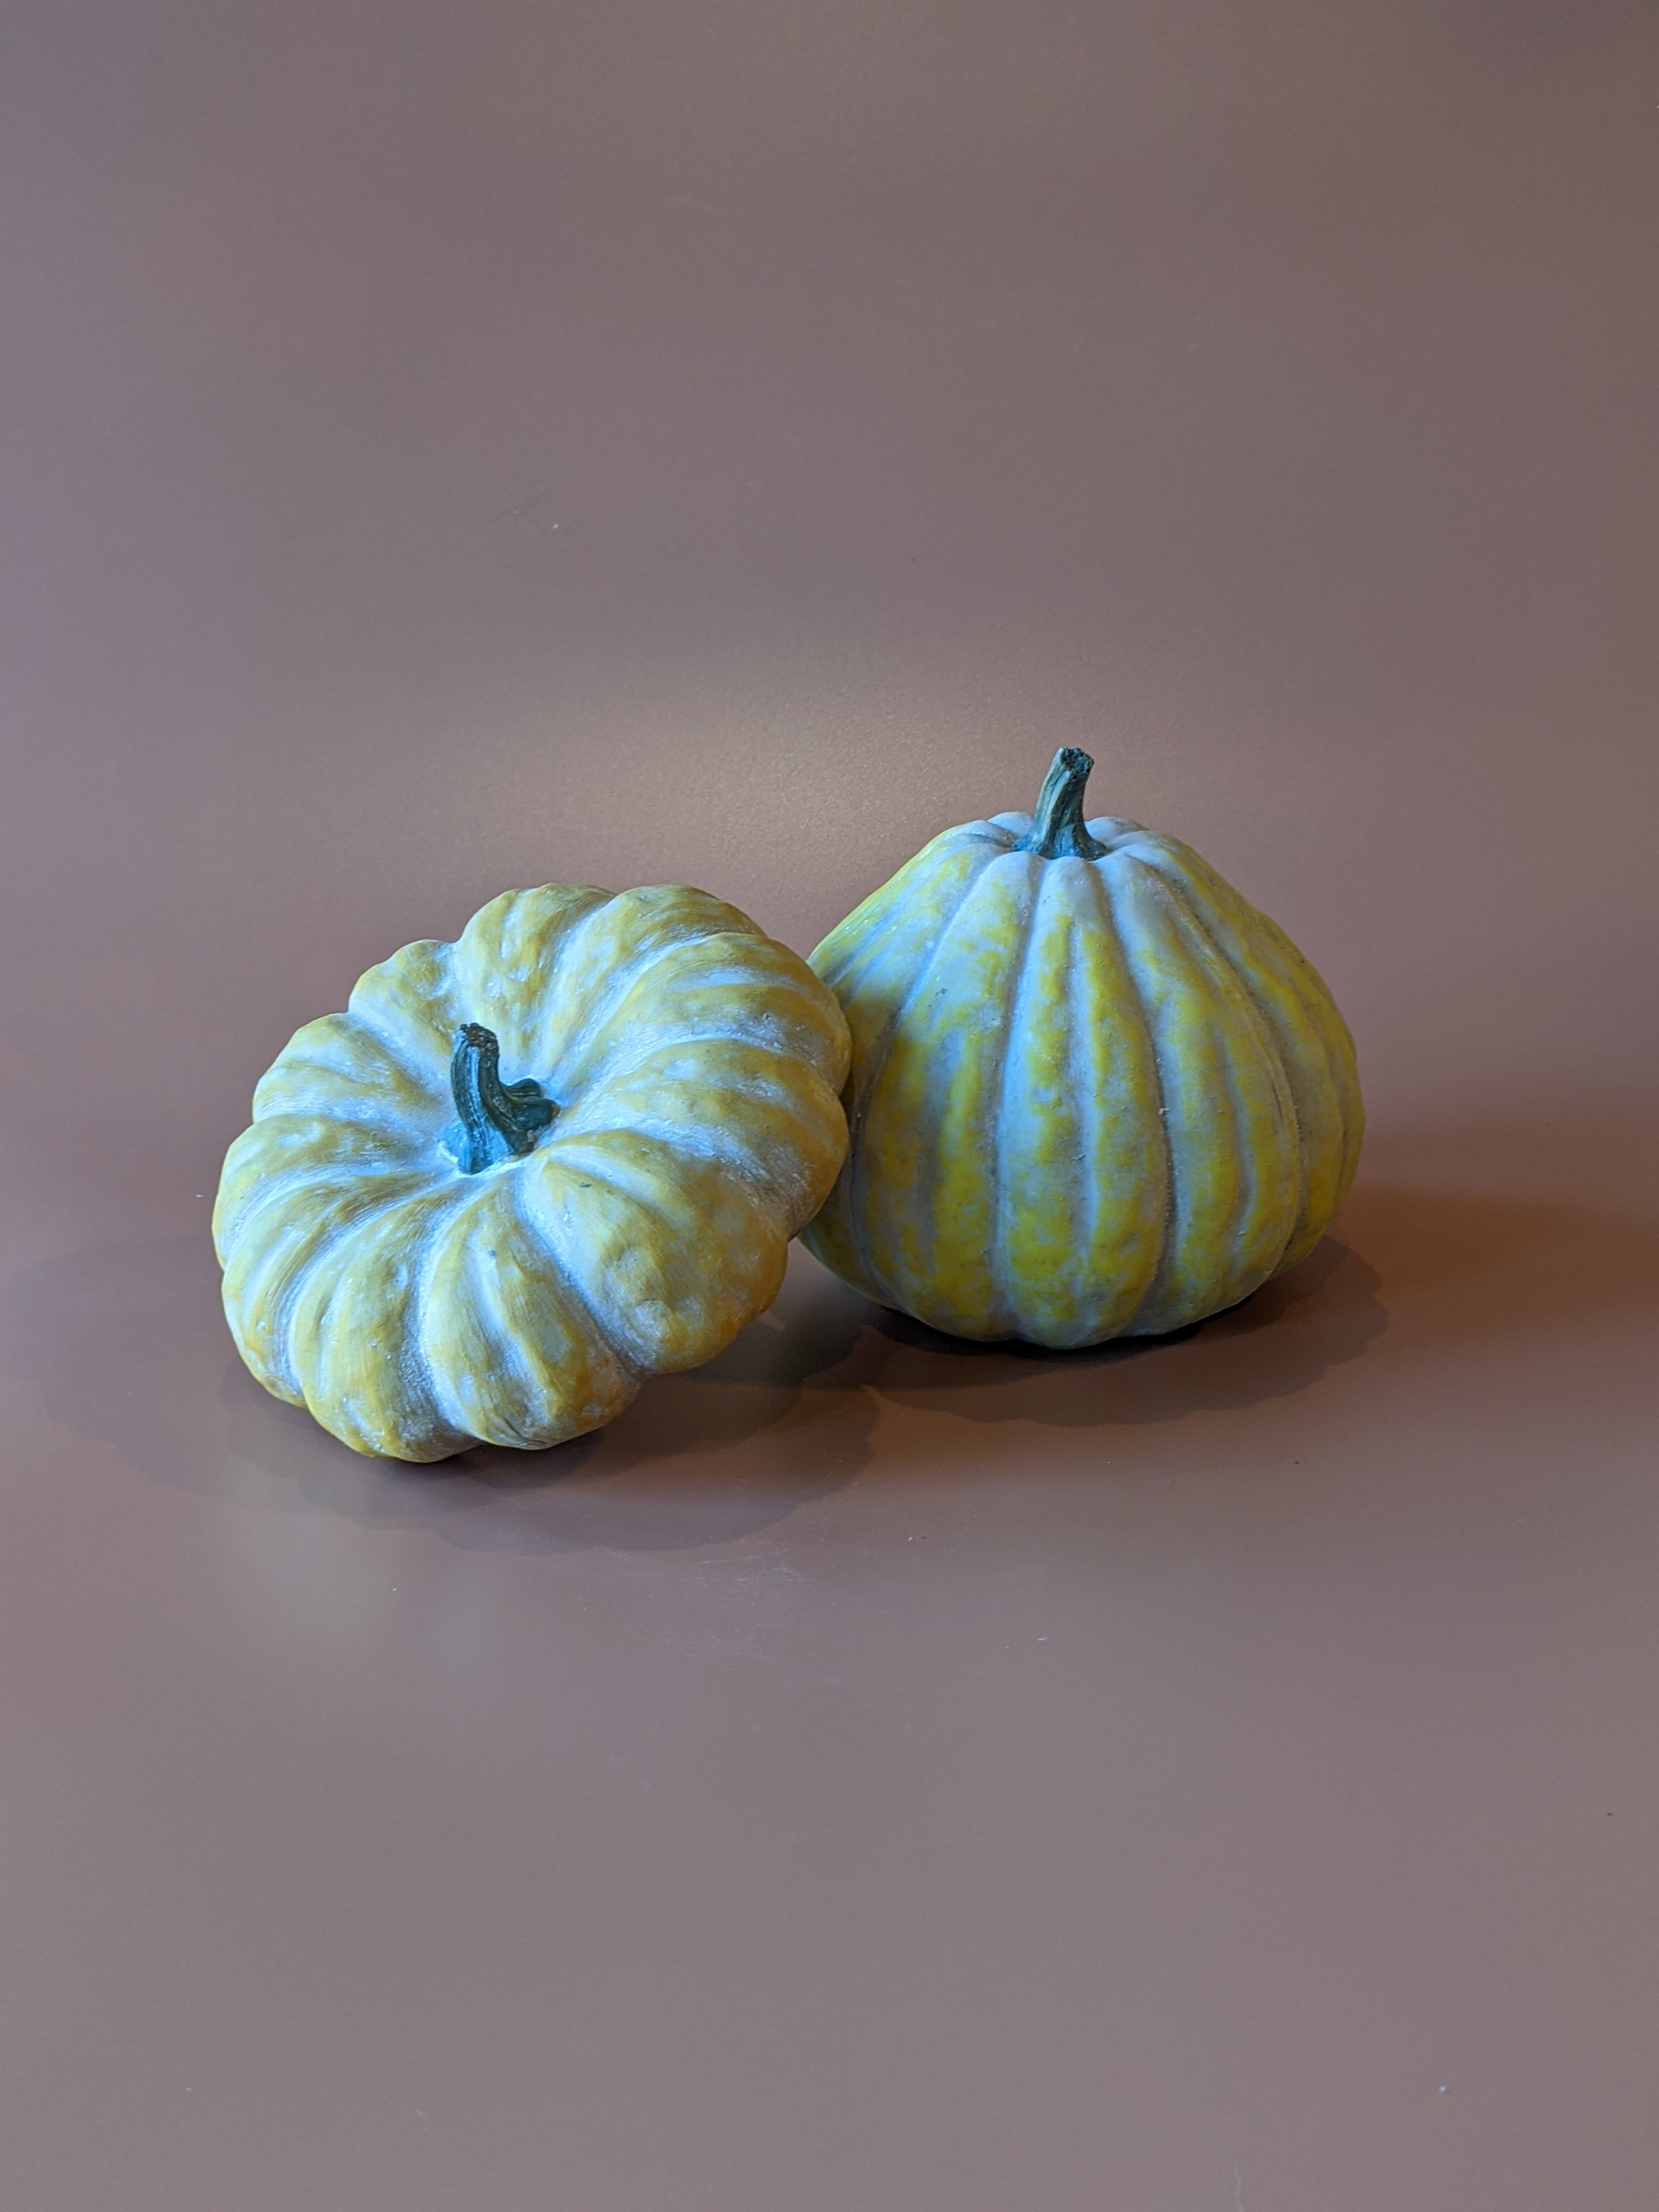
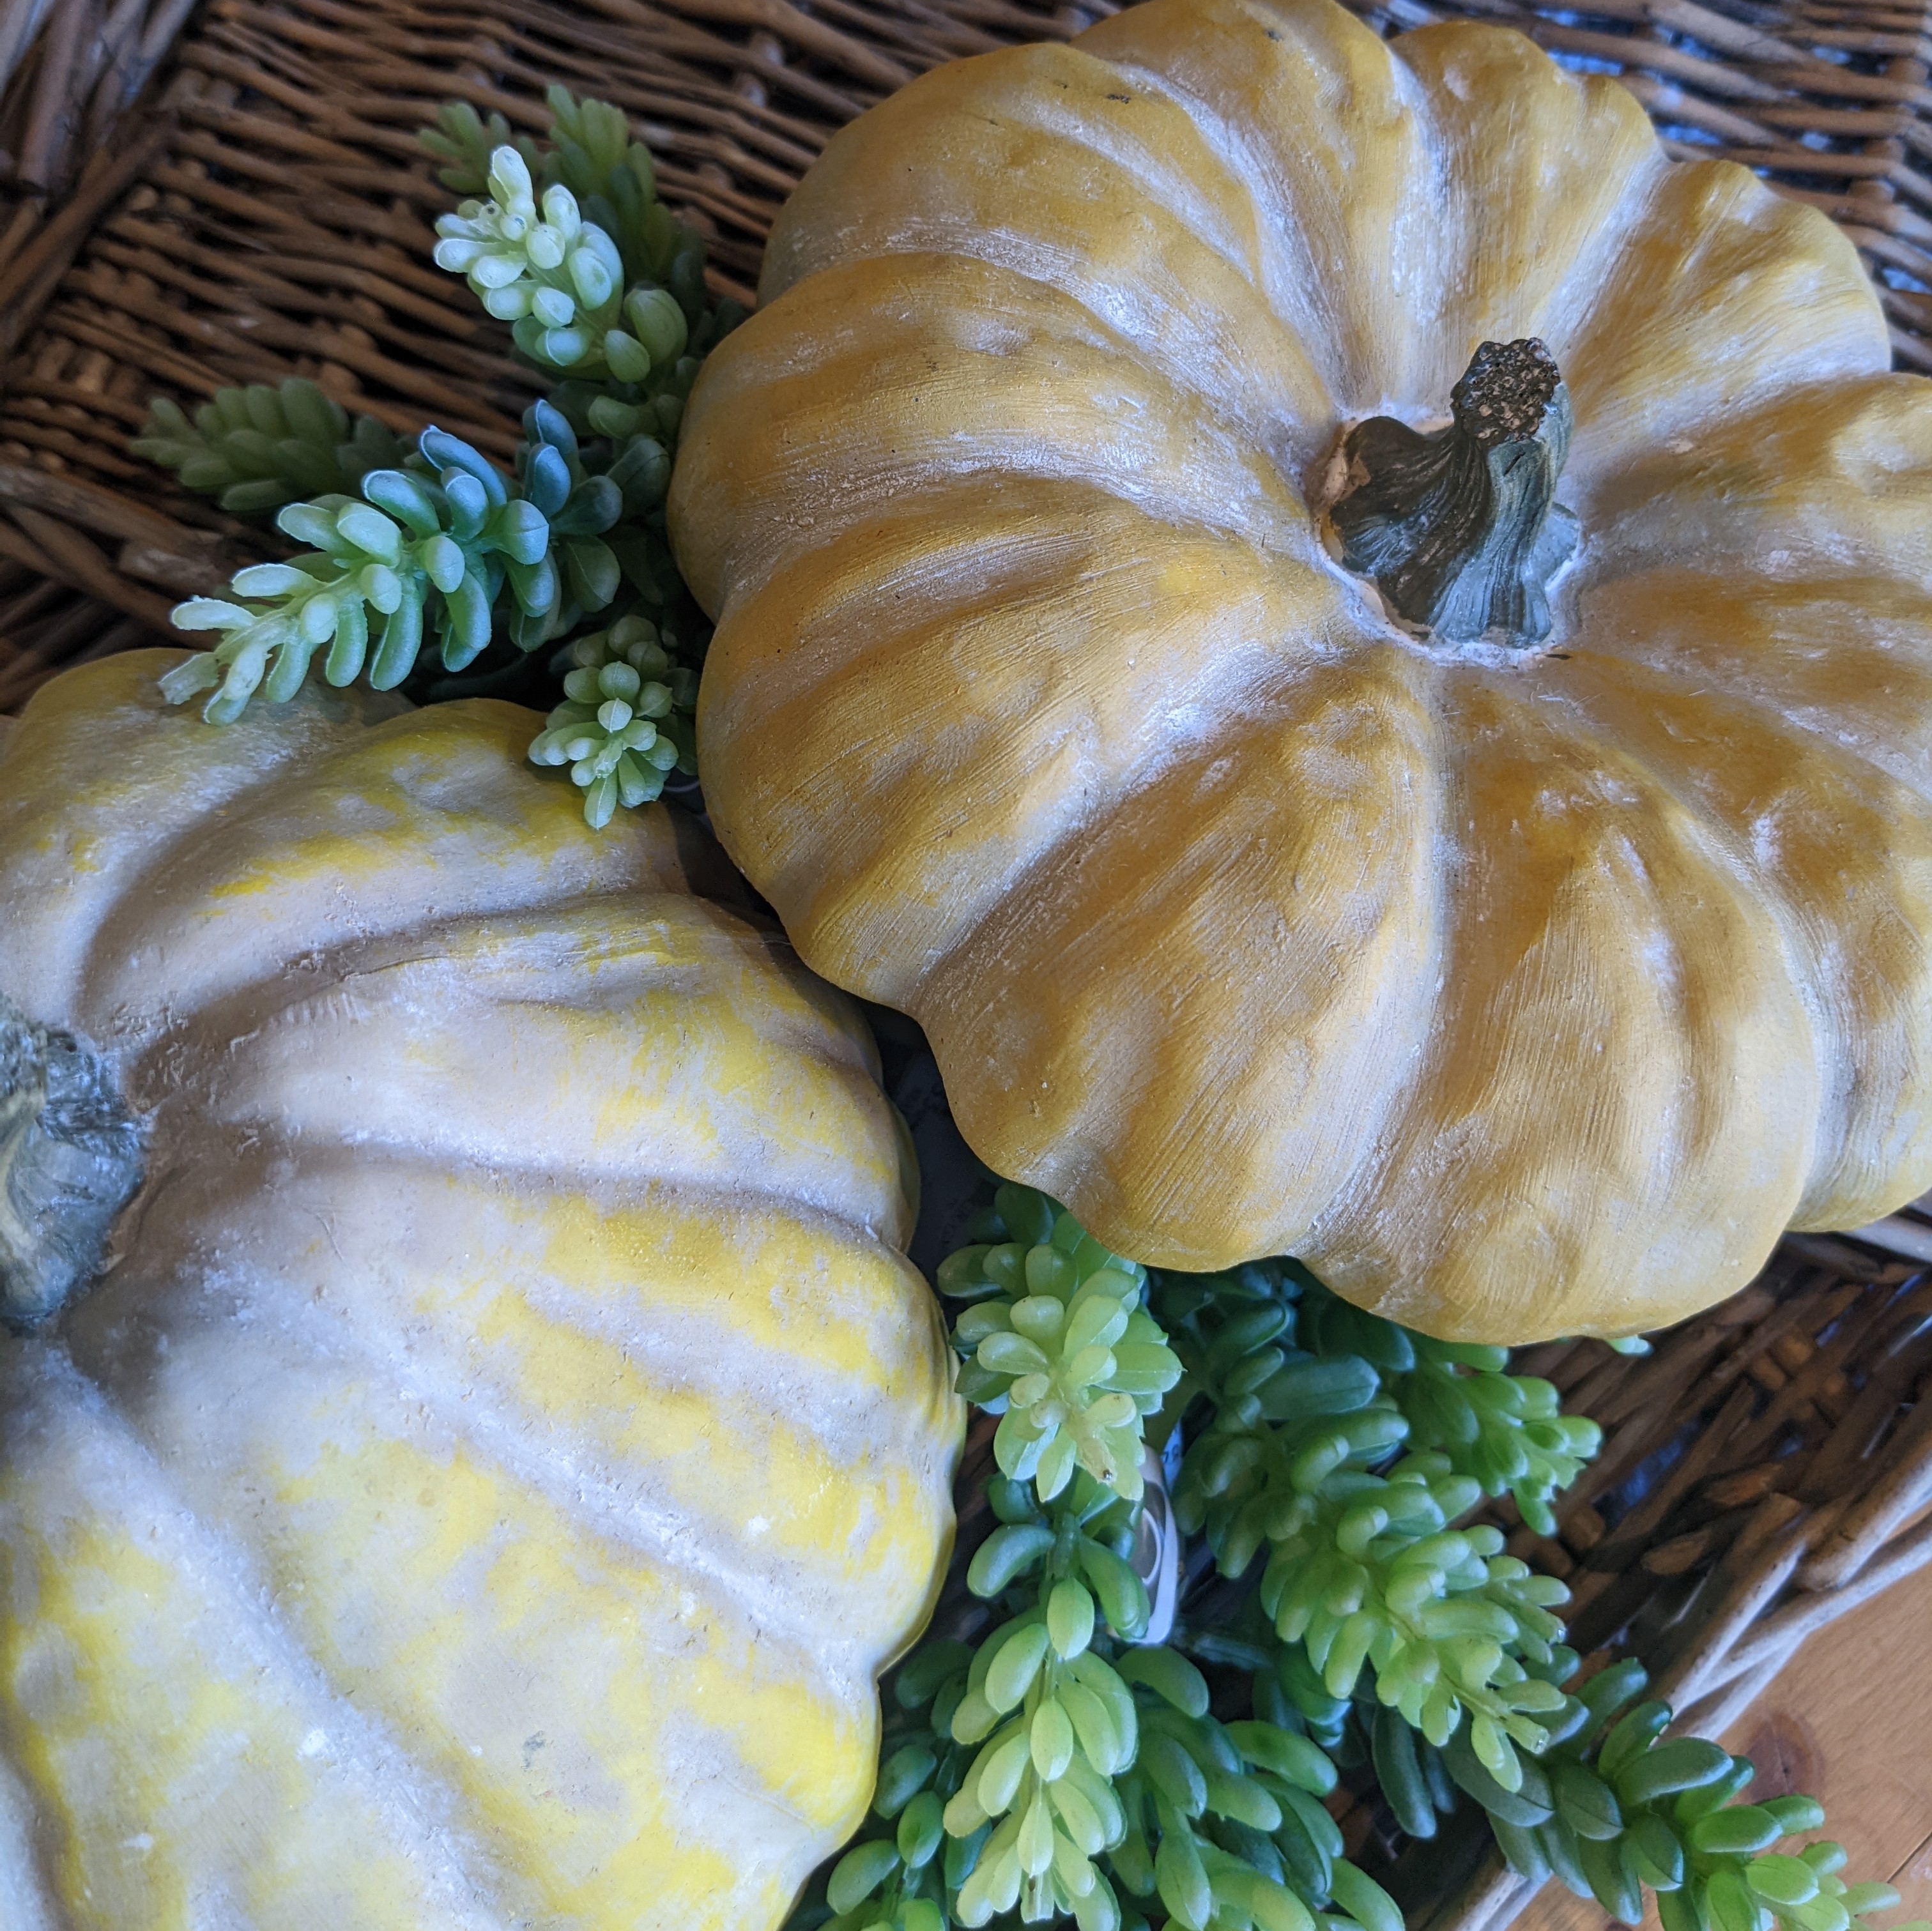
3. Adjust Your View
Snapping some photos up close of your bouquets will show the beauty of the individual blooms. It will also allow you to focus your camera (or phone) tight enough to capture the three dimensional aspects of your bouquet. Focus on an area that shows good depth, or flowers that are at different heights or distance from the camera.
Use the “portrait mode” on your cell phone camera to automatically focus on the product you’re shooting. Tap the center of the preview image on your screen to auto-focus. Adjust the strength of portrait mode - you want your picture focused, but not so much that the edges are a blurry mess. You could also try standing a little further away from your product and using your zoom function just a little bit.
When taking photos of vased arrangements and plants, shooting from slightly above level will give you more flowers/leaves in the shot while keeping the container in sight. Play around with the perfect angle to shoot at. A tripod stand is handy here if you’re shooting multiple images at once, because after you find the perfect angle you can keep it!
Product photos of smaller items like candles, decor items, etc. often look good taken straight on to showcase the size of the product. Pretend that your phone and the item are on opposite end of a level, and you’re trying to keep it straight.
4. Be Consistent
Take your website photos with a consistent background, from a consistent distance, with the same camera settings every time. Set yourself (and your staff) up for success. Delegate a well lit area for photos, place a small tape mark on the floor and create a written guideline for photo taking…. Which setting should they be in, which filter should they use, which size should each image be cropped to?
Create a standard photography process
This will allow you to delegate photo taking, and ensure that every photo that your shop snaps is website ready - or at the very least customer ready! It also reinforces your branding. Backdrops don’t have to be white. Show a little brand personality with a solid color or slight texture; just avoid busy patterns and colors that “wash out” your bouquet. Using your brand colors across the board on your website is going to make it look super cohesive.
You don’t have to be matchy matchy - backdrops in the same color family will work. For example, if a brand color that you have is burnt orange, your fall collection could have warm tones of yellow, rust and bronze. Remember, we are talking product catalog photos here. Have fun with your social media and blog posts, but keep your catalog images consistent.
5. Lighting Is Everything
Natural light is hands down the best light for product photography. If shooting outside, stay in the shade to reduce glare and avoid washing out your image. If you’re indoors, set up by a window if you can. If the light is too bright, a white sheer curtain will soften it. If it’s a bit too dim, a mirror across from the window can bounce light back at the back side of your product.
If you can’t access natural light, use additional lighting to create it. Just be aware of the existing light in a space and try to match it- mixing “warm” light with “cool” light can make your photo look discolored. If you’re using a ring light, try aiming the head down at a 45 degree angle to soften the light.
Try taking the photo from a slight angle or perpendicular to your light source instead of straight on. I like a roughly 60 degree angle - it gives me a more natural, three dimensional look without casting too many shadows. Imagine the light coming over your shoulder as you line up the shot.
6. Practice Makes Perfect
The more photos you take, the better you’re going to get. Set yourself up for success with these tips, then spend an afternoon shooting from different angles, with different light levels. Practice makes perfect when it comes to confidently taking product photos, but snapping with purpose pays off! A variety of product photos that show scale and depth will lead to high sales conversions and less phone calls from customers with website questions. Let your website - and your photographs - do the work for you!
Love these tips - or have some of your own? Drop a comment below or contact Kelsey here. Happy snapping!
Blog Categories


Blog Categories
Copyright 2026 © Petals & Profits